This page is not available.
<! Commenting out old text as we are not supporting this right now.
Cyan EC: Getting Started
Congratulations on your purchase of the Per Vices Cyan EC Transceiver! This manual is intended to provide you with useful information regarding the safe operation and use of your new transceiver.
Cyan EC is intended for advanced signal processing and data collection applications.
In building Cyan EC, we aimed to provide advanced capabilities at the lowest possible price. This product provides a sophisticated platform capable of advanced RF Signal processing and includes a robust and fully integrated RF chain.
Our hope is that you will find Cyan EC to be a useful and dependable companion in your engineering, development, and research efforts.
We welcome your feedback so please feel free to contact us.
Obligatory Notices
This product is subject to the Per Vices terms and conditions.
Please review these terms and conditions carefully, prior to purchasing or using our products.
If you have questions, please contact us for more information.
Specifications
Every effort has been made to test and measure the validity of this equipment. However, these specifications may change from time to time without notice.
Warnings
| Warnings | |
|---|---|
 |
RISK OF ELECTRIC SHOCK Do not attempt to modify or touch the internals of this device. Ensure host computer is properly grounded during operation. Disconnect AC power during installing or removal. |
 |
HOT SURFACE This device may become very hot during operation; avoid contact. Ensure adequate ventilation and that unobstructed fan inlets. |
 |
LABORATORY USE ONLY This device has not been approved by any agency or approvals body for Electrical Safety, Electromagnetic Compatibility, or Telecommunications at the time of distribution. Research use only! |
| Attention | |
|---|---|
 |
OBSERVE ESD PRECAUTIONS This device contains electrostatically sensitive components: it may be damaged by static discharges. Observe ESD precautions & proper grounding when handling, installing, or removing device. |
 |
RF TRANSMITTER This device is capable of RF transmission on bands or frequencies subject to regulatory oversight. Operators are responsible to ensure use of this device meets local regulatory and legal standards, as they may apply to you and the band of interest. This device is intended for test and measurement use only. |
This device is not approved or licensed for transmission over the air using an antenna. This device is capable of RF transmission on bands or frequencies subject to regulatory oversight. It is the exclusive responsibility of customers and end users to ensure use of this device meets local regulatory and legal standards, as they may apply to you and the band of interest.
Overview of Setup
<!
Figure 1: Overall installation and configuration procedure.
<!
 Installation and configuration comprises of four parts:
- physically setting up the hardware
- configuring the host network interfaces,
- building and installing the Per Vices libUHD library on the host computer
- installing gnuradio
Prerequisite
- Cyan EC with Micro SD card inserted\(^1\)
- Power cable
- 40G qSFP+ cable(s)
- Ethernet cable
- Host computer with a 40GBASE-R network card installed
Plugging in the devices
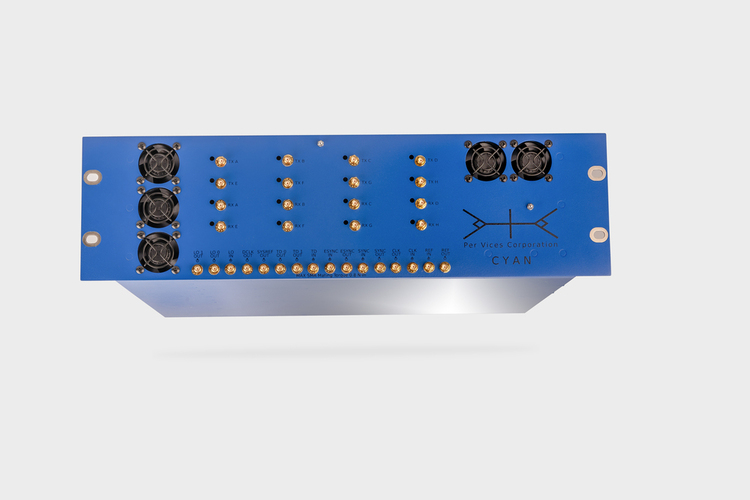
Hardware set up is reasonably straight forward. As shown in Figure 2, you must connect the ports in the correct order, with the following procedure.
- Ensure the Micro SD card is fully inserted inside the Micro SD card reader.
- Plug in the power cable at the rear of Cyan EC.
- Connect Ethernet cable from host computer to Management port on front of Cyan EC.
- Connect 40G qSFP+ cables from 40GBASE-R network card installed in host computer to qSFP+ ports on back of Cyan EC.
- Turn on the unit and wait for the LEDs on the front of Cyan EC to light up.
<! Figure 2: Physical installation of Cyan EC hardware.
<!
Great! Now that your device is up and running, it’s time to make sure it can connect to the network.
LED Boot Sequence
When Cyan EC is powered on, the four status LEDs next to the SD card will begin to light up. A normal LED sequence is shown in Figure 4.
<! Figure 4: Cyan EC Status LEDs Normal Boot Sequence
<! | Figure | Stage | Description | | — | — | — | | | a | Device is powered on |
|
| a | Device is powered on |
|  | b | FPGA is operating with a stable clock |
|
| b | FPGA is operating with a stable clock |
|  | c | FPGA is up and Linux is booting |
|
| c | FPGA is up and Linux is booting |
|  | d | HPS is up and Linux has booted |
|
| d | HPS is up and Linux has booted |
|  | e | Server is booting up |
|
| e | Server is booting up |
|  | f | Server has booted up |
Great! Now that your device is up and running, it’s time to make sure it can connect to the network.
Footnotes
- \(^1\) This is how Cyan EC ships. If you have any issues or concerns regarding your Micro SD card, please contact us.>